
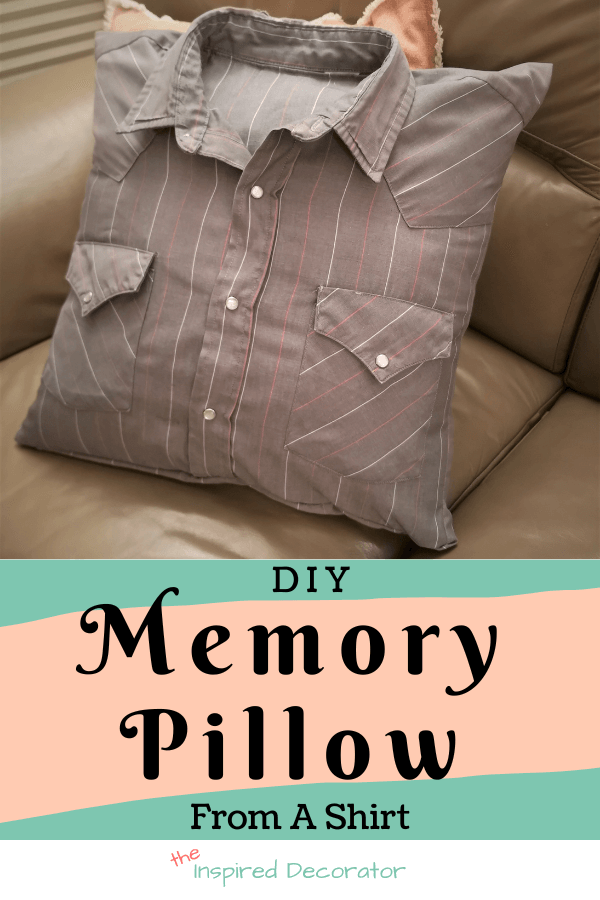
Hello, my DIY-loving friends! Welcome back to another Less Is More Thrifty Thursday series. It seems that I am on a sentimental project kick lately. The truth is that I am tackling projects that I have been meaning to do, but never finished. Some I never even started for fear of wrecking it. This memory pillow from a shirt, my Grandpa’s shirt to be specific, is one of those projects.

First I want to mention how much I love collaborating with my fellow home design bloggers for this monthly post. We love sharing our amazing project ideas with you. And they really push me to make sure I get my projects done on time. Make sure to check out their projects at the end as well.
This post contains affiliate links. Please see my full disclosure policy for more details.
A Favorite Shirt Memory Pillow
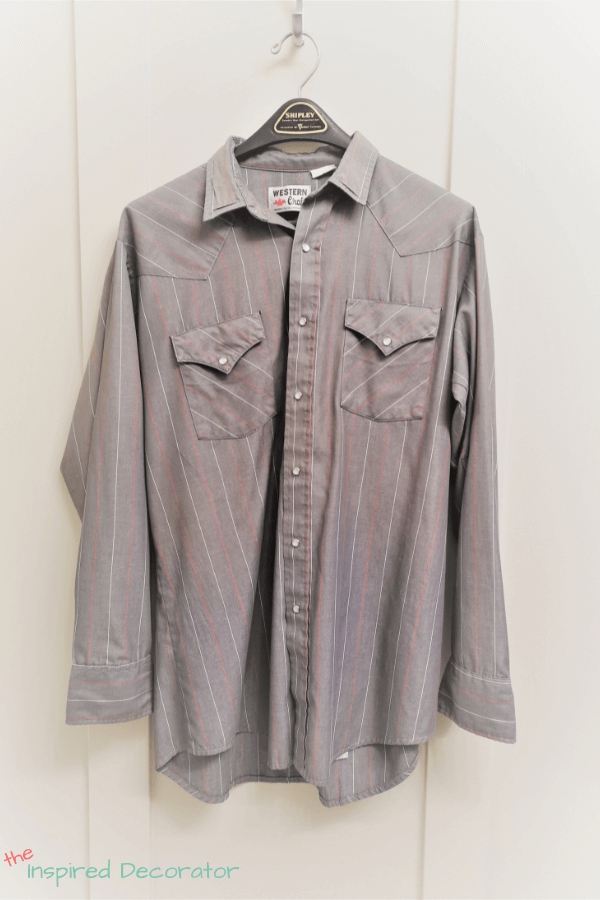
2 years ago my Grandpa passed away and it was devastating. He was the solid foundation for our family and we suffered a blow from his loss. My Grandma has not been the same since his passing nor has our family. A while ago we had been gathered at the farm, I had everyone pick out their favorite shirt of his for me to make into memory pillows.
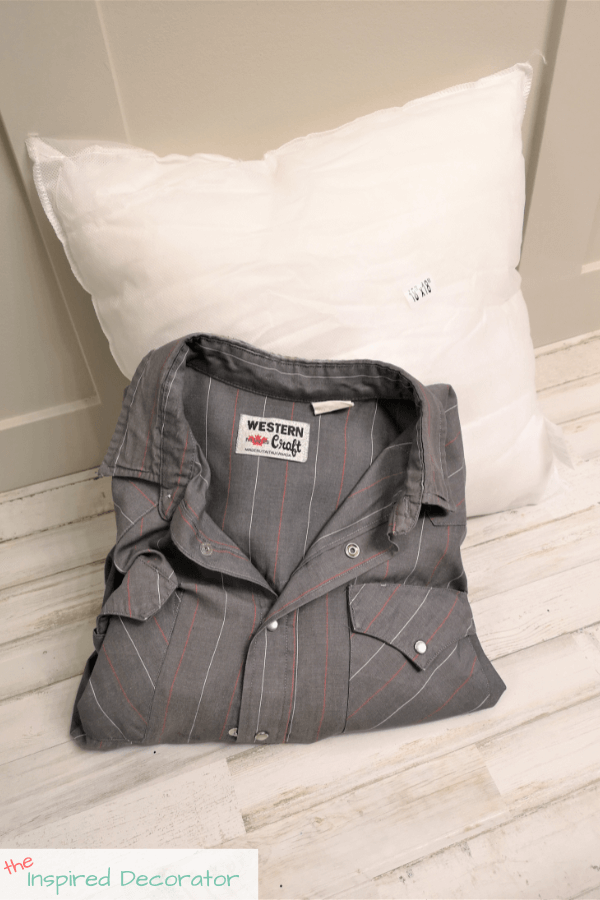
I bought the pillow inserts, pressed the shirts, and stored them to preserve the smell of Grandpa’s cologne. And left everything to sit.
This year my Grandma has suffered health issues. I wanted to get her shirt memory pillow made to comfort her during these difficult times. I only wish I got over my anxiety sooner to make it for her.
It was difficult to cut into something so treasured. I constantly worried I was creating a mess and wrecking a treasured shirt instead of turning it into something beautiful and meaningful. But I’m glad I was brave enough to try it, the end result is worth it and it was ended up being therapeutic to work on.
If you are ready to make one yourself, here is how I made my first Memory Pillow from a shirt.
Supplies for Memory Pillow
–Favourite Shirt
–Pins
Getting Started: Plan Your Memory Pillow

My Grandpa was on the smaller side so an 18″x18″ pillow was the perfect size for his shirts. You may find you need a different size for a better cut and fit.
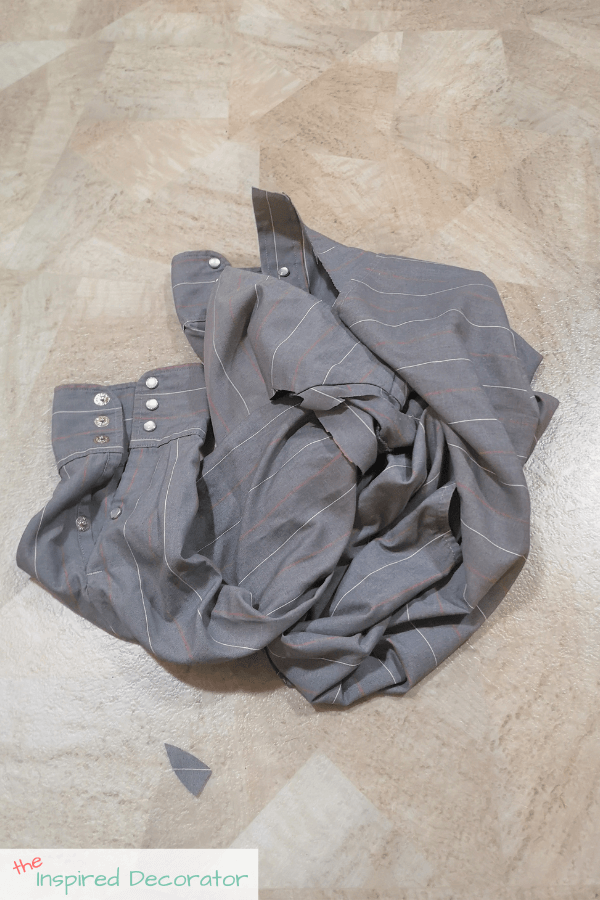
The first thing I did was slip the pillow inside the button-down shirt. This way I could see where the pockets lined up, how the collar would rest, and where I would want to make my cuts.
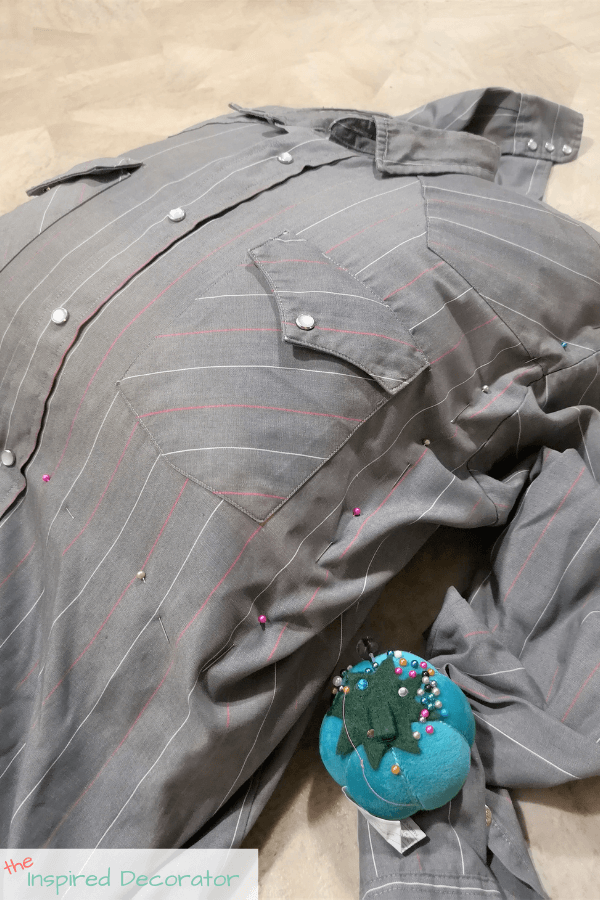
Then I pinned the shirt closed around the pillow. This was so that the fabric didn’t move out of place when I was cutting the shirt. Note From Experience: Be sure to pin the sides so that the seams meet at the middle of the pillow sides. You don’t want to have more fabric coming from the front of the shirt than the back (or vice versa) otherwise, the fabric will be harder to sew together. It will cause the fabric to be bunched up on the top or bottom while you’re trying to sew the two sides together instead of laying flat together. I know this now from having the backside slightly longer than the front.
Make Your Cuts
This is the step that stopped me for so long. It took some work to allow myself to cut into my Grandpa’s shirt. Having the pins in place around the pillow gave me more confidence to make the cuts and get going.
I don’t know about you, but for me, sentimental projects feel a little more stressful and weighted because I want them to turn out good. With DIY, there’s always an element of surprise and creative liberty so I’m never fully sure what the end result will be. When I’m experimenting, such as painting this rainbow lamp, then it’s more freeing and fun. With sentimental projects, I have to really trust that I know what I’m doing and that my calculations are accurate.
So once you’ve made your cuts, hang on to the scrap pieces. You are going to want to save a larger section, like a sleeve, to make a flap to cover the opening at the collar. You’ll see what I mean in a few steps.
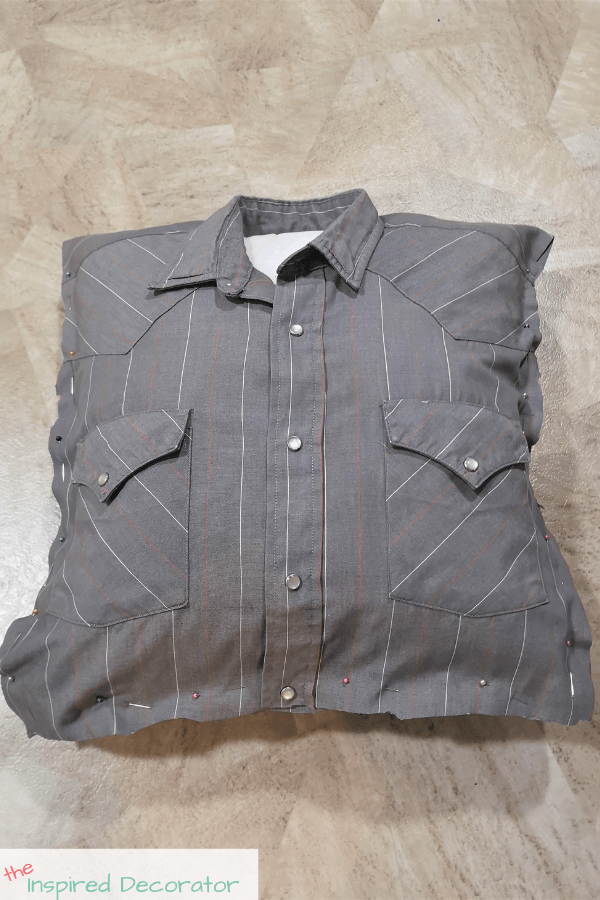
Now you can take your pillow insert out of the shirt and unpin it. Trust me. It’s going to look better if you flip your shirt-pillowcase inside out for stitching. I found it was easiest to unbutton the shirt to get the insert in and out whenever I needed to throughout this whole process.
Flip It and Reverse It
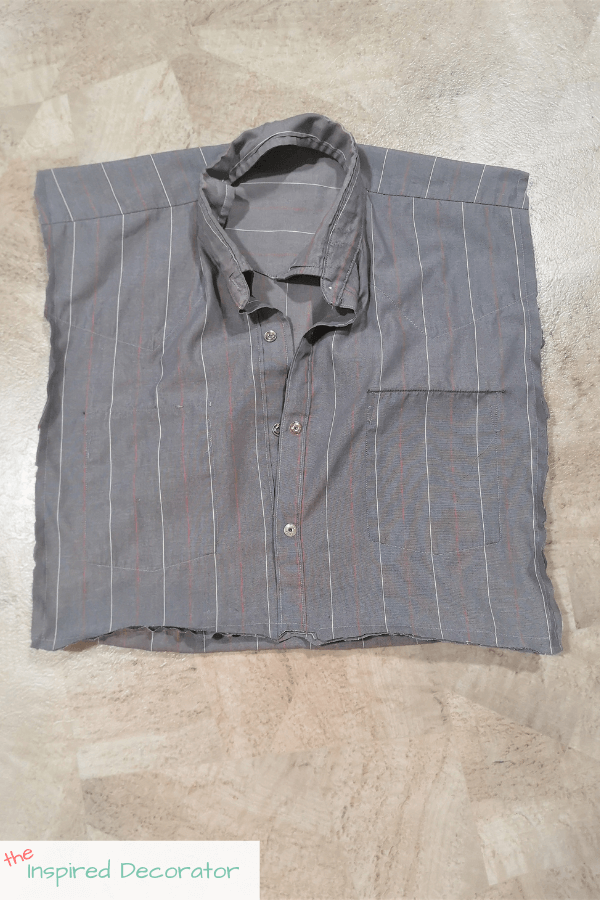
Take the pillow insert out of your shirt pillowcase and then take the pins out of the shirt. Flip the shirt inside out and place the pillow back inside it. Repin it just like before but with the shirt inside out. I know it feels like an extra step, and I was trying to see if I could get rid of any of these steps. But I feel the first step for planning your pillow placement is important, and this one will give you cleaner edges.
Now you’re ready to sew the edges, and this time your roughly cut edges and stitch lines will be inside the pillowcase instead of visible on the outside.
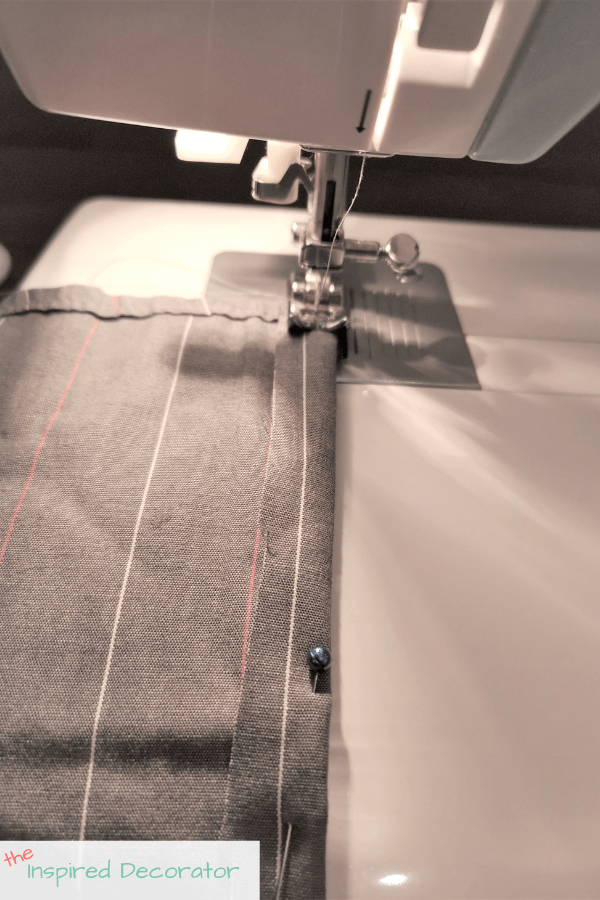
Sew It Up
Take the pillow insert back out of the shirt. You’ll want the fabric to lay fairly flat as you work and avoid it bunching along the seams as you sew. Set up your sewing machine with matching thread (I used grey) and get ready to stitch it up. I sewed up each side individually, and did a reverse stitch at each end to secure my thread in place.

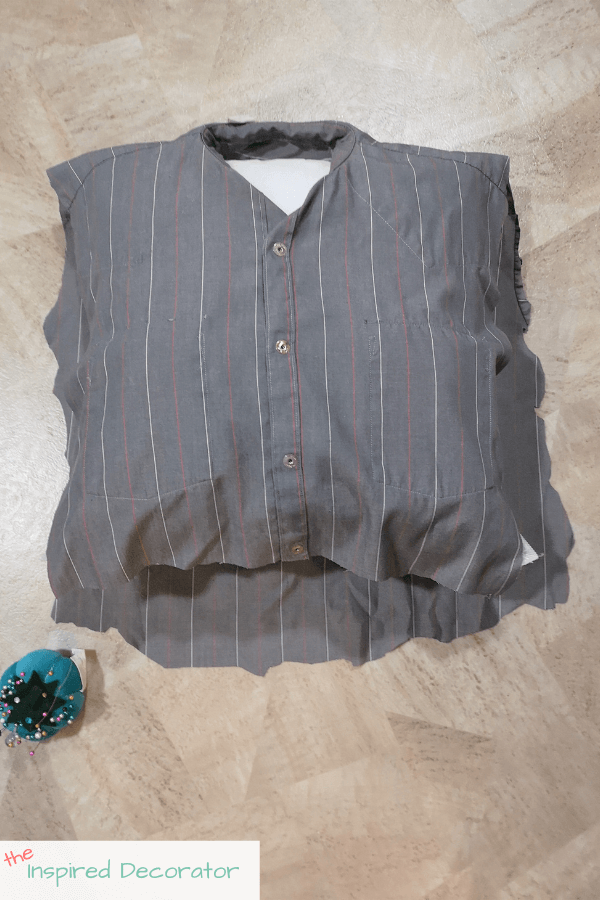
Once you’re done sewing, you can flip the memory pillowcase back the right side out and admire your handiwork.
But you’re not quite done yet! You’re going to add a flap inside the pillowcase to hide the pillow insert. This really makes a difference in how the pillow looks and feels without much more effort. Good thing you saved those scraps!

Turn Scraps Into Flaps
Cut a large enough piece of fabric to full cover the pillow insert and tuck inside the shirt pillowcase. You can use a sleeve that’s unfolded or a section along the shirt tail that you cut off. That’s where I got mine, then the pin stripes were going in the right direction.
Sew up the sides of the sides of the flap so you dont have a rough edge that frays.
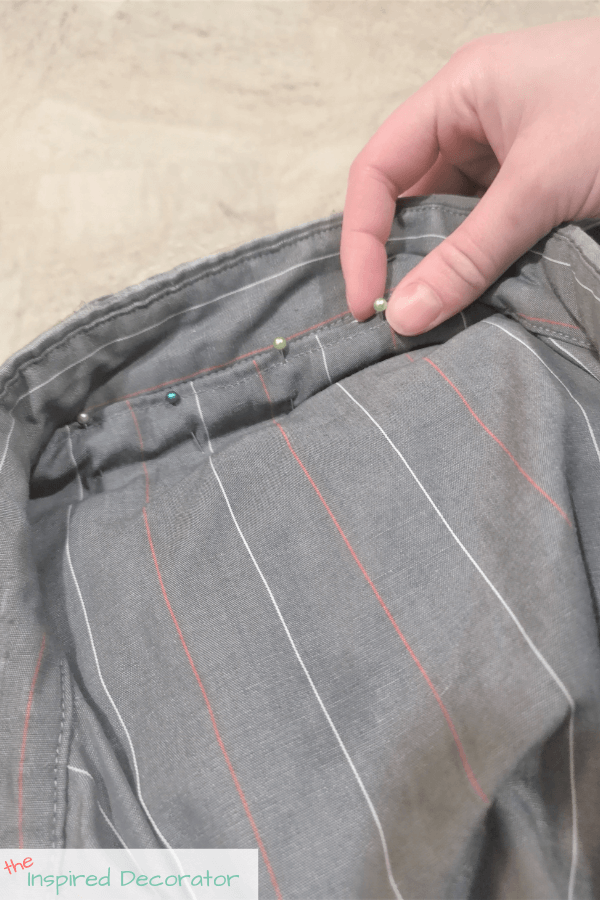
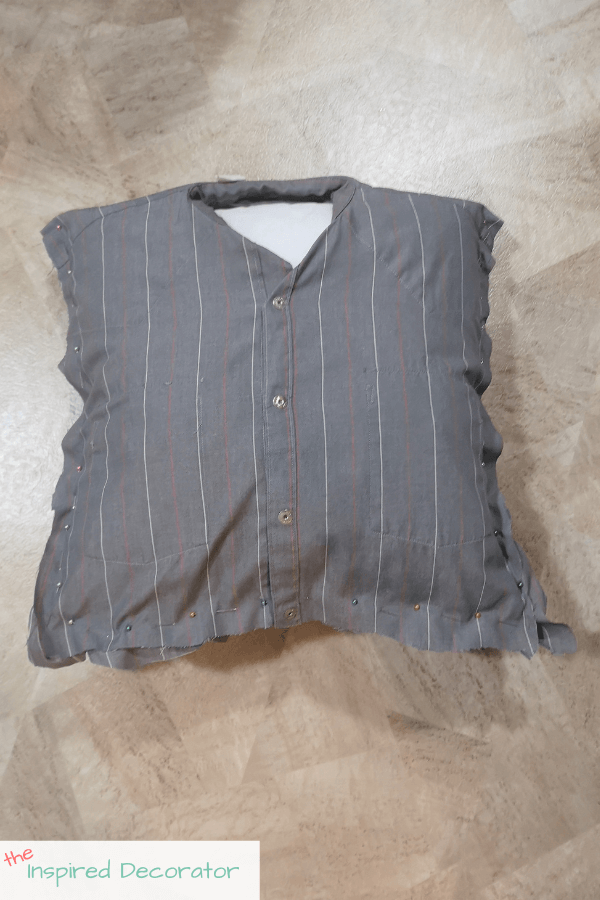
Then pin your flap in place along the collar line. I attached mine so that it fits snug right under the collar.
Now you can sew your flap in place. Take your time with this as your stitches are seen on both sides of the pillow.
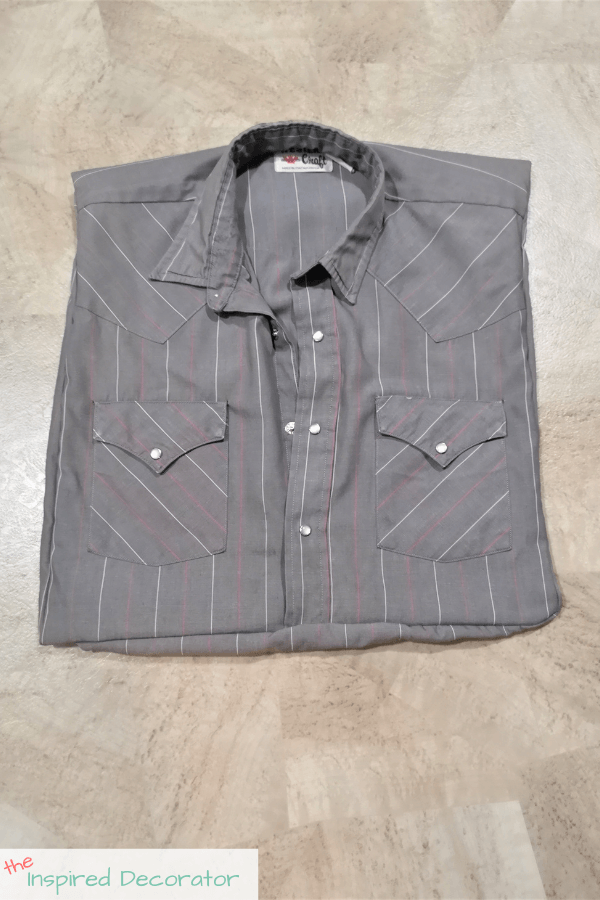
Here’s how my pillow looked before the flap was attached:
And here’s with the flap sewn on and sticking out:
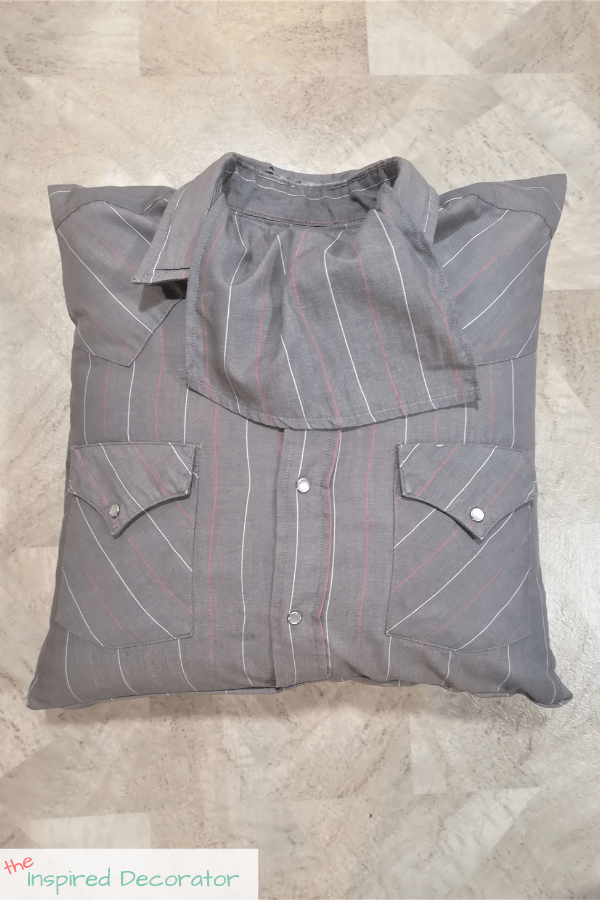
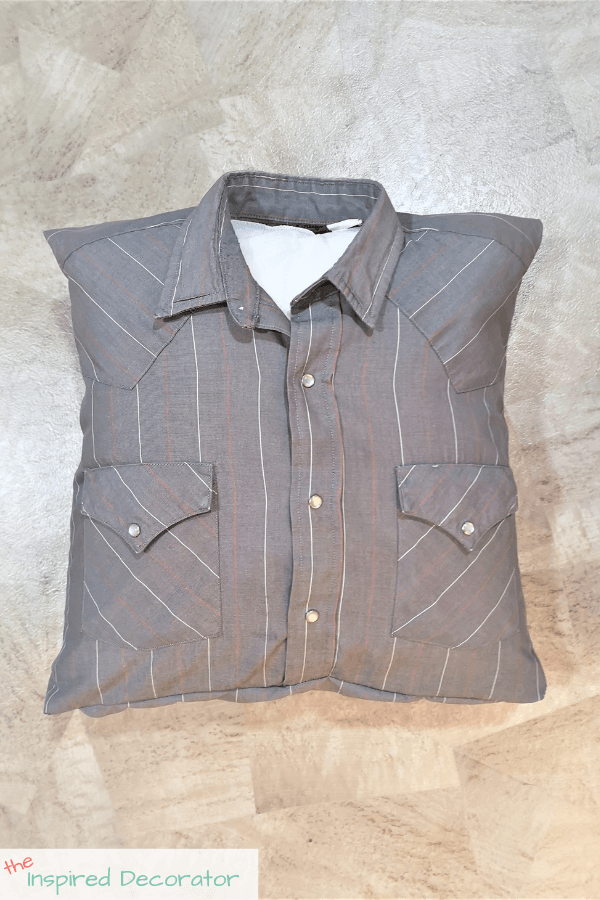
Now here’s the pillow with the flap tucked in and hiding the pillow insert:
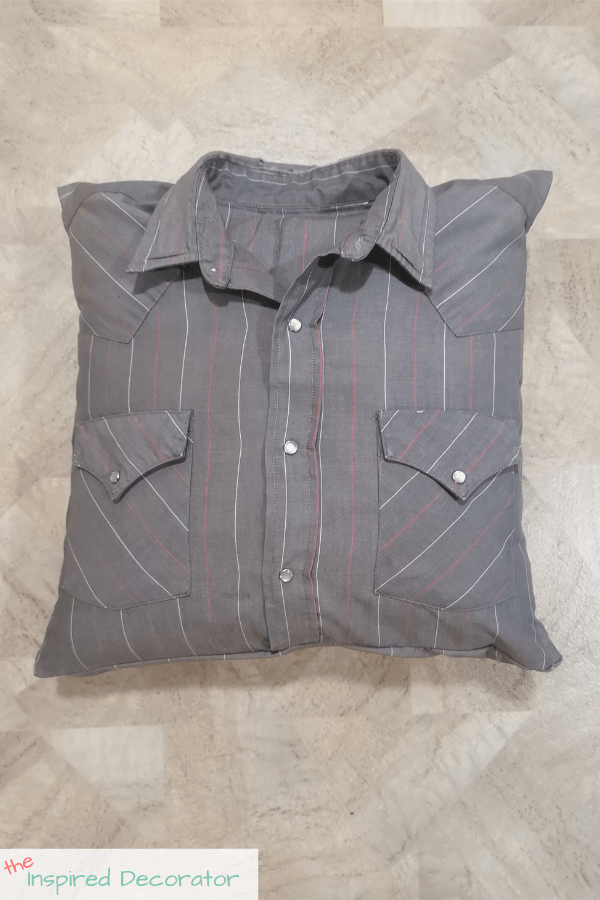
Doesn’t it look so much better? And the insert can be easily removed for cleaning by flipping it up and unbuttoning the shirt.
A Happy Ending
I am very happy to report that this pillow was allowed into my Grandma’s hospital room. And it made her so happy! Which was worth all the anxiety about cutting my Grandpa’s shirt to make a memory pillow.

I added her name onto the back of the pillow using htv and my heat press. This way her pillow won’t get lost. I attached it on the back of the pillow under the collar so it would be visible if checked over, but wouldn’t get rubbed off easily.
I hope these instructions are easy to follow and inspire you to make a memory pillow from a shirt too. Once I sat down and worked on this pillowcase, it took me a total of 2 hours to plan, cut, and sew it together. I hope this project and yours bring you or a loved one great joy!

More Thrifty Thursday Projects
The Lived-In Look turned smooth glass lamps into textured, rustic lamps

Windmill & Protea turned a waste basket into a beautiful woven basket:

Practical Whimsy Designs did a great job refinishing this folding table set. It looks brand new!

Pin DIY Tutorial for Memory Pillow From Shirt
Sara, how would you suggest adding a tie to the memory pillow? My husband had 2 favorite shirts & ties that I want to do but adding the ties have me stumped.
You could try stitching the tie to the flap of fabric inside the pillow? Then it would appear to tuck into the shirt too, althought it might also appear to be attached to the back of the shirt. Perhaps you could stitch it down the front, over top of the buttons? I suggest playing around with the layout before attaching the tie. If there’s a pocket on the shirt, then perhaps the end of the tie could be tucked into a pocket like a matching pocket square? I hope this helps!
I love the instructions you have given. For some reason I am not able to see the pictures. Is there a glitch on your end? I really need to see how you do the collar and the flap. Can you help me? TIA
Tina
Thank you, I did have a glitch but the photos should all be viewable now. I wish you all the best with your project.
Thank you for such clear instructions and photos on making a memory pillow out of shirts. My daughter’s friend asked me to make several out of her Dad’s shirts who recently passed. I consider myself a good sewer often making my own patterns but was stuck on this. I’ve had a shirt pinned on a pillow form for 6 months now and just couldn’t get past this step because I was so afraid of making a mistake and ruining the shirt. I know how valuable memories and cherished items are after losing both of my parents within the past year, which just made this so much harder to do. You gave me the courage to move forward.
Thank you so much for your comment Debbie. I hope you are able to easily follow these directions as you make your pillows. Making the first cut was very difficult emotionally, my heart is with you.
Thank you for sharing such clear instructions on making a memory pillow. My daughter’s friend asked if I could make some out of her Father’s shirts who passed away. I’ve had one shirt pinned to a pillow form for 6 months now afraid to move forward for fear of ruining the shirt. I’m a very good sewer often making my own patterns but was just stuck on this project.You gave me the courage to move forward.
Thank you so much for sharing such clear directions for these pillows. I have a dear friend who ask me to make some of these from here recently departed Grampa. Now I can tell her I can do these with confidence!
Lin, I wish you all the best with your project for your friend. Take care and thank you for your comment!
How did you cut top at collar
Hi Joyce, I’m uncertain what are you are referring to. I left the collar and shoulders intact. The shoulders form the top fold for the pillow and the back and front are still attached at the collar. I cut the arms and the side seams off where I had pinned the shirt to match the pillow size. Is this the area you are wondering about?
Hello Sara-Lynn:
My daddy passed away on 7/12/21 at age 93. He wore flannel plaids year round, complete with a Columbia vest!! We have all picked out a favorite flannel or plaid shirt of his for a memory pillow and your instructions will be how I make them. Thank you for posting this special project and blessings to you and your Grandma, as my momma and family will feel this same love soon!
Sincerely,
Jupe
I’m sorry for your loss June. I hope these memory pillows give all of you comfort and fond memories. I’ll be thinking of you as you take on this project. I’m sure your Dad is looking down on you and smiling.
Omgggg, this is such a sweet idea!
For all who have lost a loved one, my deepest sympathy. I understand being nervous to cut into your loved ones special shirt. I suggest start with an old shirt , one with no meaning…. or perhaps a garage sale find. I think its worth the time to make a “practice ” piece before cutting into one with significance . Many blessings everyone
Thank you for your kind words Lori. Your suggestion of doing a practice pillow is a great idea for getting the first attempt jitters out of the way. Thank you so much!
My husband passed away Jan 3 very suddenly from a stroke. It’s been a crazy year, to say the least. I just completed 7 of these memory pillows. It’s 4 in the morning but I had to get them done for Christmas. Your directions got me going but I ended up serging mine and then reinforced them with sewing around the pillow while I had it inside out. I know my kids will like them. Thanks for your instructions!
Hi Janie, I am so sorry for your loss. Losing a loved one is never easy to go through. It’s such a meaningful gift to give your children. I am glad you found a way to adapt my instructions, using a serger would definitely give you a clean finish. I am mostly glad that my directions were able to get you going, I know firsthand how difficult it can be to get started on such a meaningful project. I applaud you for persevering and getting all 7 done in time. And thank you for reading my post and letting me know your story. I hope you find peace and some joy this difficult Christmas season.
My husband passed in July after a very brief diagnosis of Stage 4 lung cancer. He was a shirt-a-holic and I am glad I will be able to take some of his shirts and turn them into memories for the families of his son and daughter, along with my daughter. While some shirts he bought, there are also shirts with significant meanings — either they were given to him as a present; he acquired it as an officiant for a NCAA track meet; or it was the shirt he wore for our wedding.
I’m so glad I found your instructions. I sew, but was hesitant to attempt to the project without some guidance.
Thank you.
Thank you Karla for sharing your story and your husband’s legacy with me. I am sorry for your loss. I’m proud of you for deciding to take the step and go ahead with creating Memory shirts from his collection. It’s not a decision made lightly, and I’m sure you’ll feel fresh emotions as you work on your project. I know I did. <3 I'm sure all of his children will appreciate having this piece of him to remember him by.
My father passed away Tuesday. Reading about you anxiety about cutting the shirt just confirmed it was a natural feeling to have. Thank you for sharing your information. I have his shirts and will be making 4 or 5 real soon.
I am sorry for your loss Regeana. It is not an easy life event to deal with. Grief comes in many forms and can come in waves, it is very natural. Allow yourself the time you need, which can be different for everyone. When you’re ready his shirts will be waiting. A virtual hug is going out to you.
What a great memory for you and your grandma. I love this idea and love how it turned out.
Great Job!
Thanks Erin. It has brought her so much joy. I’ve completed 3 more now as well for my family members 🙂
Hi Sara, I’m so glad you got to finish this pillow for your Grandmother! It is such a creative idea to preserve memories.
You did a great job.